Ah, yes... Anatomy and construction of a plushie.
PLUSHIE CONSTRUCTION
PART ONE: Start with an idea. Break it down into simple, nearly-flat sections. Cut out pieces for each section, allowing extra room for seams along all edges. (And try starting with a simple idea for your first piece! Keep the number of planes and seams you'll need low...You'll thank me...)
When developing a piece, these component shapes are always a bit of an estimate. You'll usually have to alter or re-cut some of your panels as you go, as you start to understand how they will actually fit together. With this piece, I started with an idea someone had given me: a bug with a ton of legs, and markings on the sides that made it look like it had an equally unending line of eyes. Scary in reality, intriguing plushie idea...
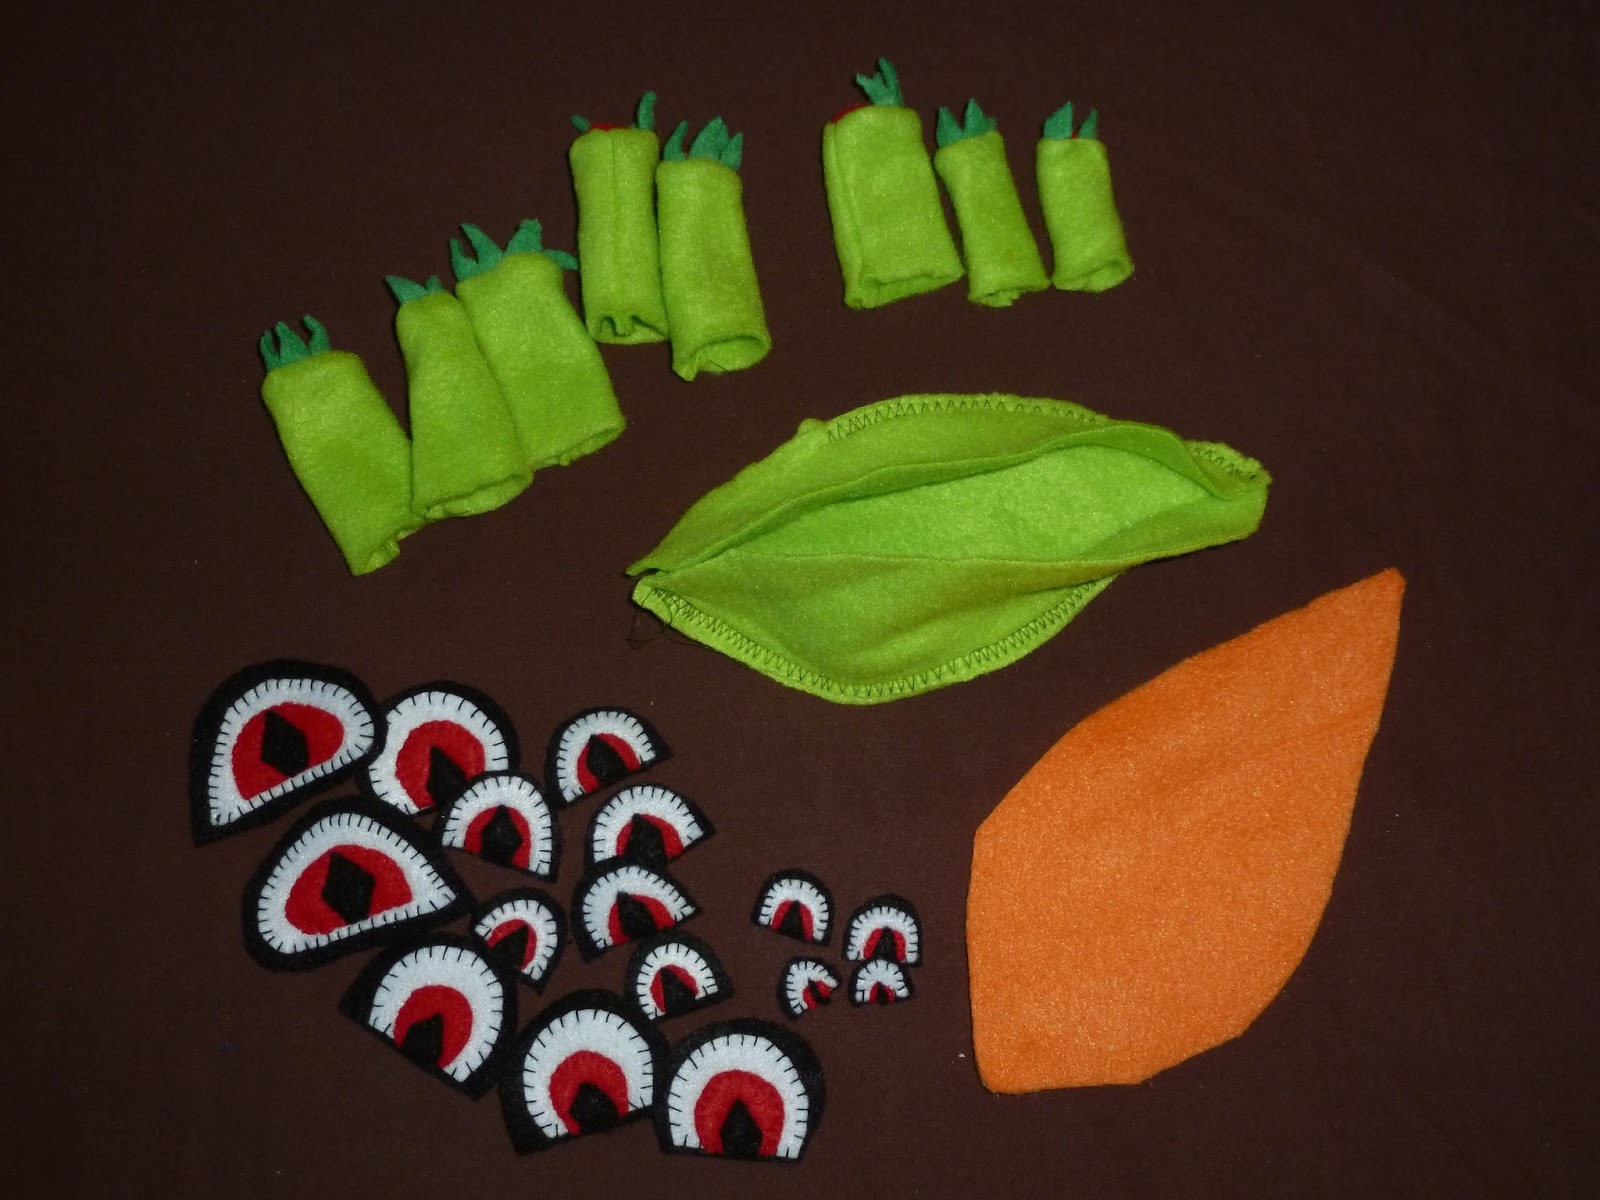
So here are my component shapes:

All sizes are approximate: we are developing a prototype. NO pressure!
Here is my collection of potential components, assembled. The side panels have been sewn onto the back panel. Each leg panel has been sewn into a tube, with the foot pad and claws capping the cylinder at one end. Add a collection of matching eyes in steadily decreasing size, and we're ready...


 Mid-assembly: the legs are sewn into one side of the inside-out body pod and are ready to be sewn into the other side.
In sewing the legs into the body pod, I also discovered that it was very hard to sew all 4 seams together (the 2 body panels and the top and bottom of the flattened leg panel). I had wanted the legs to be pre-stuffed, to avoid difficult tiny seams and laborious future stuffing where the legs joint the body. I figured I could just sew everything together like a sandwich with this design. However, the seams would not stay in place with all the stuffing in the legs pushing everything around so close to the sewing machine foot. As a result, I had to go over each seam 5-6 times before all seams were joined.


Third mental note: Feel free to check the finished side frequently. You'll find yourself wanting to sew legs in upside-down, or inside-out, until you get the hang of thinking about how it will all look LATER. So why not save yourself the headache and check if your seams are making sense now? This is also a good time to tug at heavy-use seams like leg joins, to make sure that they're really securely sewn. I usually sew over an "armpit" seam again, just to be safe. I want these creatures to be functional!
Belly-panel facing up:


Now that I have a prototype, I can replicate it if I like it enough. But I can also use that base pattern to explore what happens if I tweak one or more components--I can change color, or shape, or just size, and see how that "cousin" turns out...
No comments:
Post a Comment
I look forward to hearing from you! Thanks for your comments...